Showing posts with label Christmas. Show all posts

Wednesday, November 15, 2017

November 2017 CTMH Cross Canada Blog Hop

It's been awhile since I've been able to participate in this hop, life just seems so busy lately. I am working full time again and therefore, there isn't as much time for fun! I'm happy to be here today though and we hope that you will hop through and take a moment to leave comments on our posts.  We love to get feedback from our viewers… now on to our hop!
If you have just hopped onto my blog, you can start here as this is a circular hop, but if you want to follow us across Canada then please start at the beginning and join Michelle at My Creations with Michelle  If you came from there then you are in the right place!

This month our theme is Holidays, anything we've created that has been inspired by the holidays. For me, it's always cards - we can never have too many, right?! These are a few of the cards I've been creating over the past few weeks for events I've held:

This one features our Beary Christmas Paper collection (X7225B) and Z3378 Gingerbread Friends stamp and die set. The gingerbread boy and girl were stamped with Nutmeg ink and adhered with foam tape for dimension. I had to add a little glitter with our red shimmer trim (Z1848)

This card also uses paper from the Beary Christmas collection, as well as some Kraft cardstock and vellum. The stamp set used was our October Stamp of the Month - I hope you were lucky enough to get it! I stamped on the the vellum with Versamark ink and heat embossed with gold powder. Attaching vellum can be tricky, you don't want adhesive showing through, so I coloured in the stars with a Carmine shinhan marker. Then I put a glue dot behind the star on top and used our glue pen where the letters were a little thicker. Finally, I ran the glue pen along the edge of the vellum and stuck it down. Voila, no glue showing!

Lastly, I wanted to share this one....no patterned paper here! The first time I flipped through our Holiday Expressions catalogue I knew I had to have B1566 Frosted Christmas! So many possibilities!! I stamped the sentiment with Sapphire ink on White Daisy cardstock. Added some silver shimmer trim (Z1799) all layered on sapphire cardstock. I did add a little contraband - some silver twine that I had picked up last year. The snowflake was cut with our snowflake die from last year.....still one of my favourites!

Your next stop on the Cross Canada Hop is Nikki of Simply Artistic  If you get lost along the way, you can head to Michelle S Blog, http://mycreationswithmichelle.blogspot.ca, as she has the complete blog list.

Thanks for hopping along with us - we hope we were able to inspire you to get creative using some of the designs, products and techniques seen along the way. We hope you will join us again next month when we will be featuring our Holiday Celebrations. So mark December 15th on your calendars and hop along with us.

Roz

Friday, December 16, 2016

Christmas Wall Hanging

I know, it's been forever since I posted anything!  Moving and a trip to England are my excuse, along with 4 weddings.....no funeral!!  I have a few posts that I am working on though, just to share some of the things I've made lately.

This home decor item was inspired by a piece I saw a Michaels that was selling for $40. I loved it but couldn't justify spending $40 on something I was pretty sure I could duplicate with my Cricut.  It took me an afternoon (I'm relatively new to Design Space) to create the cut files needed for the different colours, but once that part was done the only time consuming thing was gluing everything down.  This became a class that I taught and the total time to make this was about 2 1/2 hours - cutting words in their colour choice!  We used CTMH glitter papers in silver, gold, red, and sea glass as well as some non-CTMH glitter and mirror papers for the blue colour scheme.

I started with a 12 x 12 piece of chipboard that I painted with acrylic paints to look like wood. I used white paint over all and then just dipped the brush into a little brown and more white to make the streaks, keeping the brushstrokes going in the same direction. Once the paint was dry, I laid all the cut words on my piece so that I could get the placement right, then started gluing everything down, beginning with the larger words in the center and working my way out.  Our CTMH ruler helped me keep the words along the sides straight.  My crop-a-dile punched the holes and set the eyelets in the top corners and sparkly twine or ribbon can be threaded through & knotted.  Here is the one that Amanda made with the blues and silvers:

I think these would make a lovely gift but I love mine so much that it is now hanging in my living room!

Merry Christmas!
Roz


Thursday, December 18, 2014

12 Days of Christmas Cards

On the 12th day of cards, I bring you a lovely card that I have received this year from my super talented friend, Lindeen Graw.  Her cards are always so beautiful and this one is no exception.  I just had to share her talent with you.


Isn't that pretty?  Wishing you all a Merry Christmas and all the best in 2015! 

Wednesday, December 17, 2014

12 Days of Christmas Cards

We're coming to the end of my cards but I have saved what I think is one of the nicest cards for today.  This was made with our newest Cricut cartidge - "Artfully Sent" (Z3017), which has 50 pop up cards, 50 scene cards, 50 sentiment cards, 50 pocket cards, 50 sleeve cards, plus all the icons and a font to go with them!!!  The bundle also comes with a pkg of 24 sheets of white daisy cardstock and three coordinating stamp sets - all you need to create stunning cards.


The stamped images come from B1259 Bethlehem, an older set from CTMH that I recently purchased from another consultant.  It was perfect for this pop-up card.   I used a Spellbinder die to cut the labels on the front of the card, one in Colonial White and the larger in black.  I used an embossing folder on the shimmer paper underneath the labels, and it's all tied up with some red twine.  I used a little bit of gold paper that I had bought years ago (for $3.50 a sheet!) in back of the cut out star to add a little shimmer.  Artfully Sent cut the popped out pieces along with the base card with the star burst and slits to make the pop outs.  LOVE this new cartridge!

Tuesday, December 16, 2014

12 Days of Christmas Cards

Day 10 and I have a cute one for you today!
I love snowmen!  This guy is from C1506 Flakey Friends and he just makes me smile.  He was stamped with Versamark and embossed with black embossing powder to give him a little shine, as was the sentiment from our Artfully Sent Cricut collection stamps(Z3017).  I coloured him in with our Shinhan markers, then matted with black cardstock and adhered with our 3-D foam tape.  The white daisy cardstock was embossed with my snowflake folder and Cuttlebug and was layered on top of paper from the Wonderland paper collection  - yes, it's been around awhile too!  Some fun twine and a snowflake finish this card off!

Monday, December 15, 2014

12 Days of Christmas Cards

This is my offering for the 9th day of Christmas cards:
Can you spot some more Christmas paper from Roz's paper archives....LOL  This paper is from Partridge & Pear and I hated to part with it....(shhhh...I still have some left).  Scallop edged punch was used on the Cranberry cardstock with a little bling added to each space.  The ornament strings were stamped on Colonial White cardstock with D1366 Holiday Trinkets and New England Ivy ink, the sentiment from A Very Merry Christmas with Cranberry ink.  Aren't those 3-D ornaments cute?  They were created using our Artiste Cricut cartridge (Z1790) and  B1357 "All The Best" My Acrylix stamp set.  I cut the ornaments three times for each, then stamped the cut out shapes three times for each colour, folded them in half and glued them together, then adhered to the card.  Finished with some of our retired colour-ready seam binding ribbon tied in a bow. 

Sunday, December 14, 2014

12 Days of Christmas Cards

On the 8th day of Christmas......oh wait, I can't sing...LOL  Here is the next card:
I just love this die from Memory Box and I am ashamed to say that this is the first time I've used it!  It's been in my drawer for two years.  I finally used it to cut this tree with Ponderosa Pine cardstock.  I stamped the sentiment from "A Timber" on White Daisy cardstock, then embossed it with my Swiss Dots embossing folder.  I punched flowers with Ruby cardstock, pierced them with my CTMH piercing tool and used mini brads to adhere the die to the card. I found it easier than trying to glue that delicate die cut.  Layered with Ruby and Ponderosa Pine cardstocks and it's done!

Saturday, December 13, 2014

12 Days of Christmas Cards

Day 7 and I have a card that was CASed from one of our past Idea Books and features a past Hostess Rewards set - Warm Winter Wishes.   Now I have to admit, I originally wasn't going to use this set.  I had purchased a cute penguin set that came with a die to cut them out with at Michaels.  However, I could not get ink to adhere to that stamp, the more I tried, the worse it was.  Needless to say, it went back to Michaels and I have vowed to not purchase any more from the company that made it.  Nothing beats the quality of CTMH stamps - period!  So here he is:
The background was random stamped with the snowflake from this set, then topped with an overlay cut from our Artbooking Cricut cartridge (Z1906).  The red striped ribbon is from May Arts.  Stamped that cute little penguin in black ink, then fussy cut him out and added him to the top of my sentiment.  I had been hoarding some of our retired waxy flax (I really miss that stuff!) but decided to share it with the ladies for this card - it's tied on the white glitter button.  A little bit of Stickles and we're done!

Friday, December 12, 2014

12 Days of Christmas Cards

Half way there!  This is the 6th card I have to show you:
Sparkle & Shine paper from last year was the base for this card - sometimes I buy a lot of paper and then have it for several years before I use it all up.  This year, I made a conscious attempt to use up some of my papers from the last couple of years, instead of buying a bunch of new paper!  My scrapping room is overflowing with paper, so I REALLY needed to do this!  The sentiment comes from another hostess rewards set - B1455 Be Jolly - and was stamped with Versamark, embossed with silver embossing powder.  A little Juniper cardstock for colour to mat the sentiment, trimming the chevron at the bottom.  I had to add some of our Silver Shimmer Tape (Z1799) to bring out the silver shimmer is these papers, which you can't see in the photo.  A little red twine and two white brads completed the card. 

Thursday, December 11, 2014

12 Days of Christmas Cards

OK, I think I am on day 5....this one was CASed from our Annual Expressions Idea Book with only a couple of minor changes. 
C1587 Sing Glory is one of our Hostess Rewards sets, not available for purchase.  The only way to get this one is by having a home or online gathering!  I adore this angel, the whole set really.  She is stamped with Glacier ink, then over top of her, the sentiment was stamped with Versamark ink and embossed with our silver embossing powder.  I stamped the sentiment again with Ruby ink and fussy cut out the "glory to the newborn" and adhered to the card.  Matted with Ruby cardstock, then place on a piece of patterned paper from Frosted - our Christmas paper from last year.  I added a few red sequins and some sparkles to finish it off. 

If you'd like to host a gathering to earn this lovely stamp set, let me know!

Wednesday, December 10, 2014

12 Days of Christmas Cards

Day 4 of 12 featuring Christmas cards!  I love our Polar Bear Holiday stamp set (C1557) and our Snowhaven paper pack (X7188B), both used to create this card.  I random stamped the snowflake stamp on the Glacier card base.  Added the striped patterned paper from Snowhaven and trimmed with a bit of velvet ribbon I had picked up last year.  Image and sentiment were stamped with black ink, then coloured with our Shinhan alcohol markers - LOVE them!  More snowflakes stamped with Glacier ink, then  matted with black cardstock, then popped up with our thin 3-D foam tape (Z2060), added a couple of sparkles and voila! The inside of the card says " Wishing you joy to last the whole year through".


Another one tomorrow! :-)

Tuesday, December 9, 2014

12 Days of Christmas Cards

Day 3!  This card was one that was inspired by Judy May on Pinterest....every time I searched for Christmas Card ideas, hers showed up!  It's another great card that uses up scraps and gets those circle punches in use again.  The trickiest part of this card was to get the circles to fill in all the spaces in the shape of the tree.  My ladies did this one at the card day, in both colours.....most of us prefer the blue.  What do you think?

I love all the shimmer and foil papers we used for these cards, very sparkly but not overpowering.  Sentiment and ribbon were all I needed to add.

Monday, December 8, 2014

12 Days of Christmas Cards

Day 2 of my 12 Days of Christmas Cards featuring another card we made at my annual card day:

This one was pretty simple to make but it is one of my favourite cards this year.  White Daisy cardstock was cut with a Poppy Stamps die, Merry Christmas was heat embossed with Versamark and White Daisy embossing powder on blue shimmer paper.  Added a strip of silver Shimmer Trim and some sparkles, both from CTMH - done!  I always say, less is more sometimes. :-)

Sunday, December 7, 2014

12 Days of Cards!

It's a chilly Sunday morning with overcast skies, a perfect day to get my Christmas cards written out!  Then I realized I hadn't photographed some of them, or posted them here, so here we go.  Day 1 of twelve days of Christmas cards: 
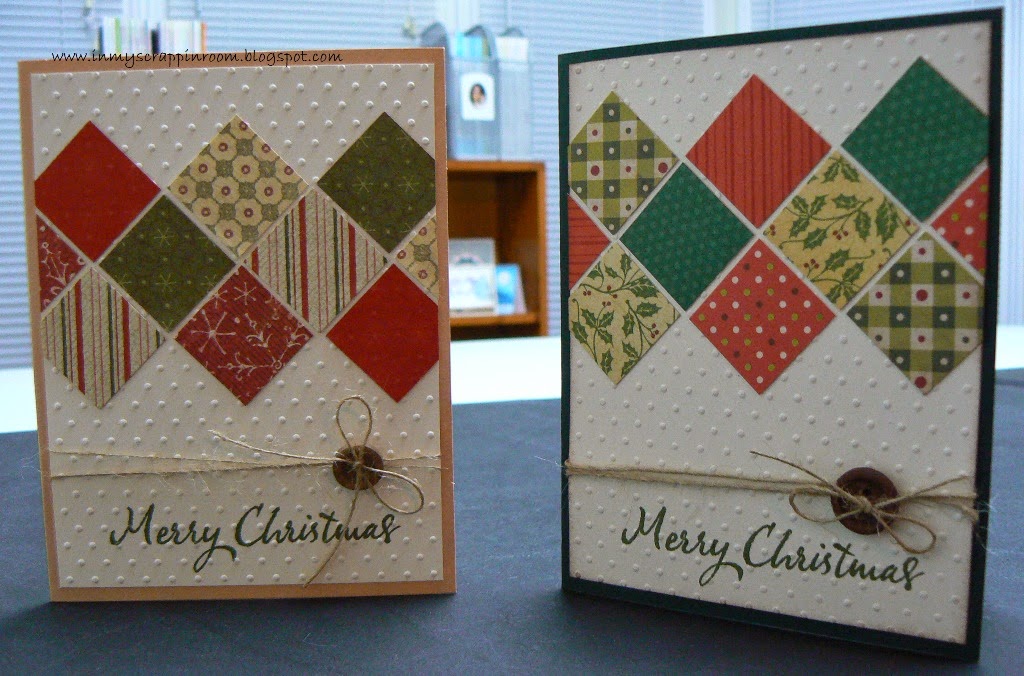
I first saw this card when a friend of mine, Bonnie Robar, was making it during our cottage weekend.  Then I saw it again on Pinterest but both versions did not have the twine and the button - I felt my card needed something in that space and the twine kept with the "rustic" feel of the card.  Just like making a scrap quilt, this card is great for using up scraps of paper.  This was one of the cards I did my the ladies who attended my annual Christmas Card Day and we did it in both colours.

Thursday, November 27, 2014

Christmas Layout for lots of photos!

Are you like me and take tons of photos at Christmas?  I usually have to sort through them to choose the best few for my layout, or I end up doing multiple layouts to get more photos in my album.  This layout will help you scrapbook more photos on one double page layout.  Z1325 Flip Flaps are the secret!  My hostess club ladies created this last night - my Christmas Gift to them!  I was inspired by a layout done by Mary Jo Abel using this paper pack, Yuletide Carol Z7187B - but I have changed mine up quite a bit to make it work for me! Here we go:


Anyone recognize the title?  It is actually from an old paper collection called Notebook, we trimmed the pink border off and it was perfect for this layout! Don't even ask why I had 7 of these title stickers hanging around after all these years.....can you say hoarder!! lol  I also gave each gal a colonial white embellishment package (retired) that contained the ribbon and brads, also some metal tags and buttons that they can add to the layout later, once they've attached their photos.   We stamped  images from Yuletide Greetings which goes with the classic feel of this layout perfectly.

Hope you like this one, maybe I've inspired you to give our 12" Flip Flaps a try!

Friday, November 15, 2013

Cross Canada November Blog Hop - Holidays From the Heart Gift Guide

It's been a couple of months since I've been able to participate in this hop but finally have a little time to do the fun stuff I enjoy doing!

Welcome to our November Blog Hop featuring creations made with products from the Mini Holidays From the Heart Gift Guide.   To purchase any of the items seen in our blog hop today, contact your local consultant to place an order.

We hope that you will take the time to leave comments on our posts, as we love to get feedback from our viewers....whether it was something that you really liked or some new technique that was used that you would like to learn how to do. Thank you… now on to our hop!

If you have just hopped onto my blog, you can start here as this is a circular hop, but if you want to follow us across Canada then please start at the beginning and join My Creations With Michelle 
If you came from Michelle's blog, then you are in the right place!

I had a layout class last night, and chose to do one of the layouts from our Sparkle & Shine Workshop On The Go Scrapbooking Kit - with a couple of modifications.  I love the layout as it is pictured, but didn't have enough of the Ruby patterned paper and zip strips for everyone.  The first change I made was to substitute our Ruby Shimmer Tape for the zip strips.
Then, I thought it needed a little more bling, so I added some mini-sparkles and some Red Glitter Gel to the title piece, and to the stamped starbursts.
 I also didn't have enough of the yoyo's from the embellishment package, so we made our own using some paper from an older collection that just happened to be juniper, added a red button and some black hemp and voila!
And then, because I didn't have enough of the ruby patterned paper from the Sparkle & Shine collection, I needed to find a substitute for the Cricut cuts for the scalloped-edged photo mats.  I cut 1/4" strips instead and punched them with our scallop edge punch and made my own frames with the pieces.  A little more work, but it was that or just use Ruby cardstock - I love the patterned paper so opted for a little more work!  There are ways around everything!

The card below was created for a gathering I did a couple of weeks ago, and I wanted to use our Stamp of the Month from last month - "Scandinavian Wishes".  Sparkle & Shine striped paper looks great on the clean white card.

If you would like more information about how I created either project, leave me a comment or send me an e-mail - I would love to hear from you!

Your next stop on the Cross Canada Hop is Sheri of Sheri Says Just Scrap It!  If you get lost along the way, you can head to Michelle's blog, My Creations With Michelle as she has the complete blog list.

Thanks for hopping along with us - we hope we were able to inspire you to get creative using some of the designs, products and techniques seen along the way. Join us again in December when we will be featuring projects that would make great gifts.  We hope you will join us again on December 15th.

Tuesday, April 9, 2013

Card 8 - 14 2013 Challenge

Today I am posting cards that I forgot to post in January!  I was scrolling through my pictures and came across these, checked back in my posts, and yep...I missed them.  They are a little out of season now, but still wanted to share them.  These were some of the cards I did at my Christmas Card Play day - what a great day we had - and at my monthly card class!  There were a couple of kits left over, so I put them together in January:


All stamped images and papers are Close To My Heart...some are retired sets that I still love and use every year! Till next time.....

Wednesday, August 1, 2012

Christmas in July! Cards # 15-19 2012 Challenge


OK, I know it's only August 1st, but I was busy making Christmas cards last month for a workshop. These are the five cards we made, two of each, so everyone went home with 10 cards. Now that's what I call a good head start!


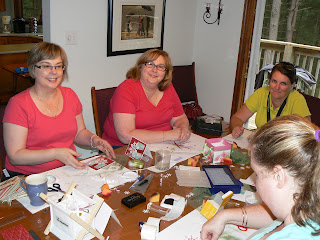
And these are the lovely ladies hard at work (play?) last Sunday afternoon:


 Lots of fun on a rainy afternoon!  Hope you can join us next time!!

Saturday, November 27, 2010

Layout # 101 & 102 2010 Layout Challenge


Wow, there's only a few more days left in the month - which means only a few more days until I draw the winner for my blog candy. Welcome to all my new followers, I hope you enjoy being here! You still have some time to increase your chances of winning by sending your friends to my blog! (see original post for details) But now, on to another couple of layouts for our 2010 layout challenge. The first layout was my October hostess club layout, I still need to find some photos for this one! The second I did at a crop a few weeks ago. The photos are 22 years old now but it seems like they were taken only a few years ago.
Materials used: 1st layout is all CTMH except the googly eyes! Hooligans level 2 paper pak, My Acrylix "The Boo Crew" & "Party Animal", watercolour pencils, black ink, liquid glass, markers. Title was cut with Lyrical Letters with my Cricut. "Santa Baby" has paper and letter stickers from a Christmas slab from Michaels (old!) and cardstock from my stash, ribbon, metal embellishments (unknown brand) and dimensional stickers from the dollar store.

Friday, November 19, 2010

Pop-up Stage Christmas Card


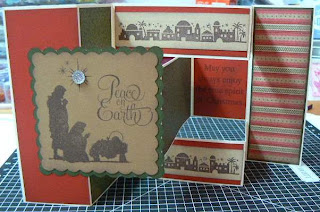
We had our first snowfall last night and everything looks so pretty! I drove my son to work this morning and witnessed the not-so-pretty driving skills of some people.....a car spun out on a main route and thank goodness there were no other cars around him at the time. I guess it will take a couple of days for everyone to re-learn winter driving! But because it is so pretty out there, it puts me in the holiday mood so I am posting this card. It is the project I will be doing tomorrow with about 45 ladies at an all-day crop and they are a lot of fun to make. Here is one tutorial for making them: http://www.paperpunchaddiction.com/2010/09/pop-up-stage-technique.html


Materials Used: All Close To My Heart - Mistletoe Level 2 papers, "A Timber", "Holiday Commentary" and "Neighborhood" My Acrylix stamp sets, Chocolate, Cranberry, & New England Ivy inks and markers, Liquid Glass, Glitz Stardust, Prisma Glitter. I also used some MS red tinsel glitter on the houses.